skip to main |
skip to sidebar
Original Title: Uh-Ohs And Party Rentals
Don't you hate it when you write a blog post a week in advance, and then all your plans get ruined? Ok, maybe this hasn't happened to you (lucky), but that's exactly what happened to me! I just found out our second party rental company has been lying to us for weeks about their availability, and now we're at a loss as to what to do!
But first, I'll let you read what I wrote last week, so you know the back story. I need your help, hive! And sorry in advance, this is a long post!
A word of caution for other brides to be: if you have your heart set on something from a party rental company, make sure you've also found that something at another company as a backup.
I'm speaking from firsthand knowledge!
Early on in our wedding planning, around the time I was envisioning tablescapes and centerpiece designs, I got it stuck in my mind that we needed to have purple charger plates on the tables. I felt it was really important with a buffet dinner to have a place holder, since the dinner plates wouldn't be set up on the tables ahead of time. And I really loved that they added color to our tables.
Something like these Photoshop mock ups I did ages ago:

 I searched and searched the websites of every party rental company in the area, and finally found 13" purple chargers at a company in Sonoma, a measly 88 miles from where I live. Not a problem though, totally worth the drive for a sweet pop of purple color on our ivory linens, and the price of $1.50 each wasn't bad either!

{Source}
However, my sweet purple chargers ran into a problem recently. Apparently the last renter didn't treat them with much care, as many of them were returned broken, and now the rental company only has 58 chargers. Sadness! :(
They did offer me some other chargers for half price (regularly $3 each, for $1.50), but they weren't purple and I wasn't willing to settle. But without a backup ready, I was in scramble mode.
I dropped everything and searched the web again, this time for their real name, "jewel tone violet chargers," instead of just "purple chargers" as before, and managed to find another local company, Michael Hensley Party rentals, that had the same purple chargers that had gotten broken! And they're located only a couple miles from the wedding hotel! I'm still waiting for them to send me an updated invoice with the right color listed, but at least now we're saved!
So other brides, please learn from my mistake. Search out other rental companies in your area that might have replacements, in case one of your rental companies falls through or something gets broken before you can rent it. I only narrowly dodged this bullet, and it caused me a whole lot of stress!
....or so I thought! Enter yesterday, and my stress returned in triple-force!
** This is where the post I wrote last week ended **
After leaving unanswered voicemails and sending multiple follow up e-mails to my contact at Michael Hensley Party Rentals, and twice receiving the un-updated invoice with the incorrect color of chargers listed, I finally resorted to leaving a message on their general line so someone with better customer service skills than my contact would hopefully respond.
And guess what, my contact sends me this email the next day:
Hello,
I was waiting to hear back from the other rental company and unfortunately they don’t have the Violet. Did you want to keep the Amber?
Thank you,
Lying Party Rental Company Employee*
(*pretty sure that's her real name)
It's pretty interesting to have received this email, considering this person had to call me back in mid-March, so she could confirm the availability of 105 violet chargers, which she then did. My order was submitted to her on March 18th....and so pretty much my only conclusion is that she never did confirm availability, lied, or hoped that I wouldn't notice or care about the fact that she was trying to pawn off amber-brown chargers on me instead of the violet-purple ones. AND as of today, the violet chargers are still listed on their website as products they offer.
So you can be sure I'm canceling my order with this company (which also included an aisle runner)! I refuse to do business with a company who has such poor customer service that they would mislead a poor, stressed-out bride for so long.
But now I'm pretty much screwed. There definitely aren't any other purple chargers for rent in my area. Or in the Portland area (my sweet sister even offered to drive some down if I could find any near where she lives). Or on the internet to buy for any kind of reasonable price ($4-5 each is steep to me).
So now I have thought of a couple other options, that won't cost me an arm and a leg, on which I would love to get your opinion.
Option 1: Just go without chargers, and have boring tables. At least we would have my sage green napkin rings, and paired with purple napkins that's a little color on the ivory tables, but it just seems so blah and boring to me, especially compared to the Photoshopped glory of all the purple chargers in the above mock ups.
This is an example from my venue's website on how the tables would look with just napkins and no chargers:
 {Source}
Option 2: Change the table linens from ivory to lilac purple, like the below swatch. But then I'm thinking it's crossing over into purple overkill territory. Especially when you consider the purple flowers in the centerpieces and flower petals scattered on the tables.
 {Source}
Option 3: Make my own purple chargers. The cheapest I found them online was from Hobby Lobby for $1.99 each, plus $17.95 shipping. That is about the price I was going to pay to rent the chargers, but I would also need to buy spray paint.
My thought was that just painting them wouldn't be enough to not have them look cheap, so I did a little mock up last night on an old plastic plate. I used two types of textured paint, with a light purple layered on top (if I were to go with this option, I would use a darker purple, and cover them with a clear sealant). I was hoping that adding a little texture would make them look less like something I spray painted?
On the left side is a grainier texture, on the right is a hammered texture.

Close up of the grainy texture:

Close up of the hammered texture:
I definitely like the grainy texture better; it's not as shiny and uneven as the hammered side is. But do I really want to give up a weekend to another DIY project? I do have the time...but it ruins my plans of having all projects wrapped up one month before our wedding day. And I'm not even sure these would look good enough after all the work I would put into them.
Option 4: Rent purple salad and buffet plates instead, and not have chargers. A local rental company does have 8" salad plates and 10" dinner plates in purple. It still wouldn't give me the pop of color I was wanting on the tables prior to people sitting down, but it could be a doable compromise. There would at least be color on the tables while people were eating. I'm guessing for 100 people I'd need 250 buffet plates and 100 salad plates, and at $0.47 each, that's $165.50, which is actually less than renting the chargers would have been. But having to deal with yet another party rental company kinda scares me a little.
This is what the salad and dinner plates look like. I think they'd be pretty close to the color of the glass chargers, but it's hard to tell because they were photographed on a black background and the black is showing through the glass a little.
 {Source}
Option 5: Figure out another way to add purple to the tables. Suggestions? Please? I will love you forever if you can think of something!!!
Please help me hive, and let me know what option you would pick, or if you have a better idea for me. I will be sitting here, pulling out my hair, waiting for your responses!
Vote here:
Option 1: Just go without chargers, and have boring tables.
Option 2: Change the table linens from ivory to lilac purple (possibly too much purple?)
Option 3: Make my own purple chargers.
Option 4: Rent purple salad and buffet plates instead, and not have chargers.
Option 5: Figure out another way to add purple to the tables. (please submit your suggestions in the comments)
So I know my over-the-top flowered shoes aren't for everyone (but I love them, so that's what matters, right?). However, the ribbon roses my mom made for them could be used for a ton of other projects too! For bouquets, boutonnieres, on a dress sash, in your hair, grouped together to adorn pews... there are a lot of possibilities out there!
A while ago I searched the Weddingbee blog for a tutorial on ribbon flowers, but could only find clay and fabric flowers, so I asked my mom to take step by step pictures of her making the flowers.
Here are the instructions:
Cut the ribbon to desired length. We used 1-1/4 yards of 1-1/2” ribbon. For a smaller rose use 3/4 yards of 1/2” or 5/8” ribbon. Thread a needle with matching thread and knot the end. Fold down one corner on the ribbon and sew a few stitches. If you are using a ribbon with one “good” side, start with the “good” side down. Or you can use double sided satin ribbon, so both sides are "good."

Roll the ribbon five or six times and sew a few stitches to secure it. 
Fold the ribbon at about a 45 degree angle.
Roll the ribbon along the fold until the fold disappears.
Secure with a few stitches. Be sure the stitches secure all the layers. Stitches at just the bottom of the rose will not secure all the layers.

Fold again at 45 degree angle.
Roll again along the fold until the fold disappears.
Continue folding and rolling to the end of the ribbon. You can change the look of the rose by varying the angle and the tightness of your rolled rose.

Fold under the end of the ribbon and secure with stitches, and your flower is done.

The ribbon roses are now ready to decorate with!

You might also find this YouTube video helpful if you're planning to make ribbon flowers yourself.
Now, on with the actual making of the ankle cuff on the shoes. You could definitely do something similar if you wanted to spice up inexpensive ankle strap shoes, or even use feathers, or ruffles, or some crystal bling. There's so many ways you could decorate your own custom cuffs to make a statement on your wedding day!
I ended up using the purple Thai silk shoes I bought last summer as the base, and I believe they were about $36 from FlyJane. What was great about them was that not only were they a perfect shade of purple and inexpensive, I know they'll be relatively comfortable on our wedding day because I've worn them to work several times already.
This is what they looked like before any alterations:
 {Source}
To make the ankle cuff, hold your cuff material up (we used grosgrain ribbon because it is pretty sturdy) to your shoe, so one end is lined up with the clasp of the shoe strap. Cut the ribbon off at the other end, right before the hole you would put the clasp through. Do this twice, so you have two lengths of ribbon that are the correct length for wrapping around the ankle of your heels.
One of the strips of ribbon will go around the outside of the strap, as shown in this picture.

For the inside piece of ribbon, hold it up to the inside of your ankle strap, and make marks where the strap connects to the back of the heel. You will then sew button holes on the inner ribbon, where you made your marks.
After your ribbon is cut to the right length, and button holes are sewn in the inside layer, sew both layers of ribbon together with two rows of stitches, leaving a "pocket" in the middle where you will thread the strap of your shoes through. Depending on the width of ribbon you used, you may also want to stitch together the ribbon at the outer edges as well. Then you're ready to put the ankle cuff base on your shoes and decorate it!
Here is a look at the inside of the ankle cuff on my shoes, you can see where the button holes are on the inside layer of ribbon, and where the ends come out of the cuff at the strap clasp and strap end. As you can see, since the ankle cuff isn't sewn to the strap, it's not hard to remove it to change the shoes to a more casual look.


So there you go, that's the end of the tutorial!
But before I conclude my posts about shoes, I wanted to quickly address something.
Fashion and shoes are a very subjective topics, often times you either love or hate something. So the negative comments on my last post didn't bother me; people are allowed to have their own opinions and criticisms (even if they weren't solicited for them).
But one thing that did disappoint me was that some people didn't read what I'd written, and felt the need to criticize the look of my shoes with the dress I was wearing in the photos I posted. Even though I clearly stated in the post that it was my After Party dress.
To reassure you all, I will be wearing these shoes with my wedding gown, not that dress, so it really doesn't matter what the two looked like together! I simply included pictures of me wearing the shoes because I knew if I didn't someone would ask for them, and I thought it would be nice to show off another dress at the same time, since I don't have my wedding dress at my house.
So for those of you who were concerned that the thick ankle cuff shoes didn't work with a knee length dress (duh), here is a better representation of how the shoes will look on my wedding day, with a long dress (this isn't my actual wedding dress, but you get the idea).

And at the risk of getting more critical comments (Hey, it's ok, I feel like my shoes walked the red carpet and Joan Rivers bashed them but everyone else praised them. And I know if I had DIY'd shoes after the fab feathered Loubs, someone would have told me it looked like I kicked an ostrich or something!), here is a photo of the shoes up close on my foot, as requested by Miss Chirpie. (Sorry for the awkward angles in the last three pictures. It's hard to shoot shoes while they're on your feet! Also, unless otherwise noted, all photos in this post were taken by my mom or I.)
Have you made any flowers for your wedding, out of fabric, clay, ribbon, tissue paper or another material?
Alright, I know it wasn't very nice of me to tease you by not showing you my DIY wedding shoes in my last post, but I wanted to build up to the big reveal! :)
And I think I'm going to do things a little differently with this DIY reveal, usually I like to show the 'how to' steps first, and then show the final product, but I think it will make a little more sense to show off the fabulous shoes first, and then do a follow up on how to make them. Sound good?
Ok then! So, to answer my own question from the last post, I was inspired by a combo of the Viktor & Rolf shoes with the fabric flowers all over the shoes, and the Nina shoes, with the big flower on the ankle of the shoe. After looking at them more and more, I sent a picture of the shoes to my mom and sister, in an e-mail titled something like "Am I crazy, or could I make something like this myself?" And so I did, with a lot of help from my mom.
Here they are, my ribbon flower wedding shoes!


Eeeeeeeeee! I'm so in love with them! They are so unique and purple and flowery and gorgeous!
Want to see what they look like on me? I took some pictures with the webcam on my computer this weekend for you. (And also found out that my rehearsal dinner dress and after party dress I bought last fall are sadly too big now. So I'll only show the pics of the after party dress because it has a sash that I could just tie tighter and cinch it in, so it looks alright. The rehearsal dinner dress needs some alterations, or maybe I'll get a sash for it too, but right now it's not fitting well enough to show you--I can take it off without even unzipping it! Guess there are downsides to dieting too!)


And while we're here, let's have a closer look at the ribbon flowers. My mom made all of these by hand, 23 on each shoe! In my next post I'll do a tutorial on how to make them, and how we attached them to the shoe (the ankle cuff of flowers is actually removable!).


Ahhhhh! I've been waiting so long to show you these, since it was late February when I actually decided to do DIY shoes. But like many DIY projects, they took a long time to complete! However, all the time spent (read: all the time my mom spent) was SO worth it, because these shoes meet my criteria of purple, jaw-dropping, amazing, “OMG I’ve never seen such unique shoes” just perfectly!
Would you consider DIY'ing decorations for shoes if you couldn't find the perfect wedding shoes to buy?
(all pictures in this post were taken by me)
I know, I know, it's been a while since I've written about shoes. I sort of left you all hanging after describing just how obsessed with shoes I am, and then my dilemma about the perfect shoes that weren't.
You all were so amazingly helpful in convincing me to not wear shoes that were too big and possibly ruining them by changing their color. And you guys sent me some amazing shoe possibilities too, which I really appreciated!
After my last post, I continued my hunt for the perfect shoes, looking into some of the ones the hive sent me, and also looking at some more expensive designer shoes.
In the meantime, my mom e-mailed me this funny story, about just how early my shoe obsession began:
"When you were about 18 months old, you and your dad went with me to shop for shoes. You were in your stroller and you were fascinated with all the shoes. After we crisscrossed the mall, going to several shoe stores, we looked down and you were holding a bright pink high heeled pump. After checking, we determined that the pump wasn't sold in that store. We backtracked until we finally found the right store. Quietly, we replaced the shoe on the rack and quickly exited the store. Thus, your obsession with shoes began and has grown over the past 25 years."
See? Even as a baby, I loved awesome heels! :)
So, I continued on with my search for the most perfect, jaw-dropping, amazing, "OMG I've never seen such unique shoes" in purple. Here's a look at some of my considerations, that were close, but not quite perfect, for one reason or another.
Brian Atwood heels, loved the color, but not available in my size. Would have been alright, but not "wow," if I could have had shoe clips made to match my jewelry:
Nina heels, that were pretty, but not quite right:
Giuseppe Zanotti shoes, no longer available in the three tone purple color (but I have seen them available in white that could be dyed):

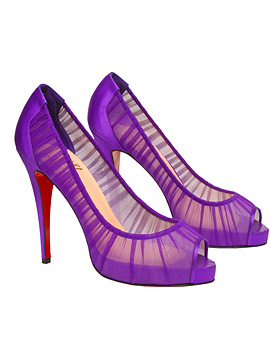
I liked these Loubs, but could only find fake versions of them online, and I didn't want to spend a couple hundred dollars on something that wasn't even legit!
Same with these other Christian Louboutin shoes, I could only find the knock offs, and also, the metallic lilac color probably was too silver to go with my gold dress anyway:
I liked these Manolos alright, but a lot of brides have worn them already, and again, only fakes available in purple:

These Viktor & Rolf shoes were pretty awesome, but not purple. Nor could I find them available anywhere:
These Loubs posted by Miss Damask on the boards were getting closer to the "OMG WOW" look I was going for....but again, not available, and not 100% perfect. But close, so very close, if only I was a feathers kind of girl!

I liked the romantic feel to these Valentino heels, but they weren't purple, and $1250 was a bit steep:
And I almost loved these, but I'm not sure patent leather was right for my taffeta dress....plus there's that pesky availability and price issue.

So after obsessively looking online for about another hundred hours, dreaming about running after the perfect shoes but never catching them, and pretty much just pulling out my hair, it occurred to me: why not just DIY my own shoes?
That had been my original idea, to DIY shoes after the ones I ended up getting (the ones that turned out not purple and too big). So why not move ahead with the DIY--after all, I've DIY'd almost everything else for our wedding!
So I ended up designing my own shoes (in Photoshop, of course!), using one of the shoes in this post as my inspiration! Can you guess which ones?
Let me give you a hint.....we bought a LOT of purple ribbon from an amazing 4 story fabric store in San Francisco.


I'd thought I would have to hold off on this project until about a month before the wedding, but we were able to schedule the time for our rehearsal sooner! This turns out to be good and bad--good in that I could now make the info packets for our OOT boxes, bad because there's been a wedding scheduled at our venue the night before ours, meaning we can't store anything there ahead of time.
You might remember the embroidery floss binding I did on our programs, which I considered doing again for these info packets. But since I'm a stickler for punishment, I decided to play with a slightly different binding method for these, involving hole punching and threading ribbon.
First though, I spent a couple evenings laying out the info and printing everything out. Most of the content came from our wedding website, so it was mostly just a matter of figuring out how to arrange the pages so they would print double sided.

After cutting the pages down to 8.5" x 5.5", I then cut slits in the back cover, for the pocket detail card.

Next up was the hardest part, punching 8 holes in each packet. Even though I was using text weight purple paper for most of the pages, this step took FOREVER, and ultimately made binding these 30 info packets harder than floss binding the 60 programs.

I did print a faint row of circles as a punch guide on the cover page though, which helped speed up the process of hole punching a bit, but didn't do anything for my cramping hand.


Once the punching was done, I cut the end of purple 1/8th inch ribbon (left over from decorating our favor boxes) at an angle, and threaded it through the punched holes. This part was actually quicker than the floss binding, because I didn't have to thread a needle each time, but because the hole punching took me so long, I still think the floss binding method was quicker overall than this method.

 (Like my PJ pants? :) )
After threading the ribbon, I just tied it in a knot on the back side and trimmed the excess.

All done! And the perfect size to fit in our 9" x 6" x 6" OOT boxes.

So, that was the binding and assembly process, now, want to see the content inside these packets?
A thank you for coming message and contact list:


The overview map from our invitations and a schedule of the weekend's events:

Rehearsal dinner map, details and directions:

Wedding map, details and directions:
Sunday luncheon map, details and directions:

A bunch of pages with descriptions and directions to fun things to do in the area, but I won't bore you by showing all of the pages; they all basically looked like this:

The back cover held the business card sized pocket details sheet:
I actually got this idea from Mrs. Apple Cider. When unfolded, this pocket sized sheet includes contact phone numbers, the at a glance schedule, and directions to the three main events. Perfect for guests to just put in their pocket or purse!

Now the only thing left to do is to stuff the OOT boxes with some treats for our guests, and drop them off at the hotel! Oh, and make an even more detailed schedule and list of things we need help with the day-of for our wedding party and parents, but that's a whole 'nother post.
How will you be getting all the important wedding event details like contact info and directions to your out of town guests?


 I searched and searched the websites of every party rental company in the area, and finally found 13" purple chargers at a company in Sonoma, a measly 88 miles from where I live. Not a problem though, totally worth the drive for a sweet pop of purple color on our ivory linens, and the price of $1.50 each wasn't bad either!
 {Source}


 {Source}


