skip to main |
skip to sidebar
Quite a while ago I lamented over what to do for our table numbers. Luminaries wouldn't work because it would still be pretty light outside at dinner time, and I just wasn't too excited about anything that I'd seen in the way of table tents or metal holders. Frames didn't really work for the feel of the tables either, and pretty much the only thing I'd seen that I liked was a plain and simple number, thanks to Martha:
 {Source}
So I set out to find my own wood numbers, but it proved more difficult than I anticipated! There are a ton of options online and in hardware stores for use as house numbers. But the problem was that I needed numbers that were at least an inch thick, so they wouldn't tip over when the table is bumped, and all I could find anywhere were ones that maxed out at 3/4" in the 4" height I needed. I did find some that were thicker in the 6-8" range, but those were too tall and would have taken away from my centerpieces. And sadly, we can't laser cut wood that thick, and I didn't want to do the numbers in layers, because they wouldn't look good from the side. I did come across these on eBay, which eliminated the need for the thickness I was looking for, but I just didn't care for the round bases.

{Source}
So I turned to the next obvious source, Etsy! I put out my first alchemy request, and got several responses, but ultimately decided to go with Lizartestry. After several back and forth e-mails to clarify what I was looking for, along with her making trips to stores all across her town to find the right wood, she made these for me for $60:


(photos courtesy of Lizartistry, here)
Aren't they lovely? Combined with my table chart that will go on the escort card table, I think guests will have no problem finding their seats. I only got numbers 2-13, since I didn't think the head table needed one, but I wanted an extra in case we have to overflow to 13 tables. They're about 4 inches high (so won't overpower my smaller table arrangements that are in the 5-6 inch vases), and an inch deep, so won't fall over when the table is bumped. The font they're based on is called "Rosewood Fill," which was the closest I could find to the Martha version of the numbers.
The artist even offered to stain them for me, but I wanted to make sure they would match our wood grain paper, so I declined the kind offer. She also made the great suggestion that we should do something neat with the numbers that make up our wedding date, 6-12-10. I'm thinking of maybe putting them in a shadow box with some of our wedding photos or something, so it's great that I'll have a use for some of these after the wedding!
After receiving the numbers, I stained them with a Fruitwood stain, that is a very close match to the wood grain paper. Here are some shots I took with half of them stained, so you can see the contrast.


And the final versions of our wedding date, all nice and stained.
 (last three photos taken by me)
I'm so glad to have put this table number issue to bed! I have no idea why I was stressing for so long about something so small, but I was.
What are you doing for your table numbers? And are you using an actual number, or going the named table route?
The second x-acto knife intensive project I recently completed was a sign that will go on the escort card table, showing guests where to find their table on the deck.
If you remember from my crazy PhotoShop post, the layout of our reception will look very much like this, with the escort card table on the grass next to the two level deck:

At the suggestion of our DOC, I not only will number our tables in order of table placement (not in order of who's more important and sitting at that table), but I also made a diagram to put on the table, so people can look at their table assignment, then look at the diagram to see where to find their table.
Similar to my Bride and Groom chair signs, I started by printing the inverse of all my shapes out on the back of the paper (all pics were taken by me):

Then I spent an entire afternoon using my x-acto knife to cut everything out:

I then glued the table numbers together, using a layer of green paper and an offset second layer of brown (printed on the green paper). These numbers match my table numbers that I finally decided on, and will share soon:

Next, the wood grain paper strips got glued together in layers, to create "steps" on the deck, and the numbers got glued to purple punched flowers, which got glued to the round tables:

Then everything except the tables were glued to the wood "decks" on a 10" x 8" sheet of purple, to show how the tables will be arranged. (And yes, that is the gorgeous paper that Miss Apple Cider used! I spent months looking for the right color of wood grain paper to incorporate into our plans, even toying with the idea of using thin veneer, until I found the answer, on Weddingbee, of course!). For the tables I used double sided tape to attach them to the deck, just in case we need to later add or delete a table for some reason.

You can see the layers and texture a little better from the side:

I then put it in a frame that matches the framed sign with our favor table, and it's done!

Do you plan to make a sign showing how the tables are laid out at your reception, to help guests locate their assigned table?
In my last post I showed you some mock ups of what our smaller centerpieces will look like. Well, next on the list is to figure out what to do for the table numbers. I've been struggling with these a lot. I'm really not a fan of the paper tent cards or paper on a stick look, they just seem so....blah (but no offense to you ladies with these, just my opinion for the feel of my wedding!).


{Source and Source}
At first I was thinking I would get cheap 4 x 6 frames from Ikea, stain them, and put 4 together in a square, with a candle in the center. I was then going to print the numbers on vellum or parchment paper, making little luminaries. Something like this (yes, of course, another digital mock up!):
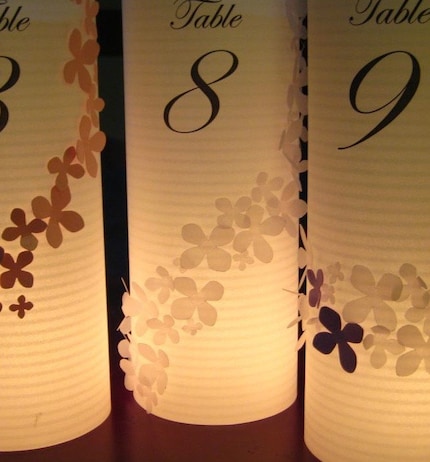
 But my mom shot that idea down because they were going to be too big compared to the centerpieces she mocked up. And I agreed, I was just bummed to be back at square one. I then found these luminaries on etsy, which were also along the lines of what I was thinking of:

{Source}
Or these DIY luminaries on a blog:
 {Source}
I pondered making something similar to these, but smaller, since the above ones are also too big, but now I've been reconsidering. With our ceremony starting at 5pm, and the cocktail hour at 5:20ish, dinner at 6:30 and sunset that night at 8:30pm, I'm not sure luminaries are the way to go. I have a feeling we won't be able to see them lit up until much later in the night, which kinda defeats the purpose, you know?
And then I have this picture that I found in the bible, er, I mean Martha Stewart Weddings. The sweet simplicity of a painted wood number:
{Source}
I love how this number doesn't detract from the centerpiece, and isn't paper, but I wonder, will something like this be too small, or too hard to see? I think if I did go this route I'd do it in stained wood, to tie in the other wood elements that will be on the table.
Does anyone have any better ideas for me? I would love to see your inspiration photos!

 {Source}




 Posts
Posts