Showing posts with label diy photobooth. Show all posts

Wednesday, November 10, 2010

A Woodside Wedding: Enjoying The Evening

After the scheduled bouquet and garter tosses were over, and the cupcakes had been served, we were free the rest of the evening to just enjoy our reception.

Our reception resembled more of a cocktail party than a crazy dance party, and was just what we wanted—time to kick back with our friends and family and enjoy everyone's company over some yummy alcoholic beverages.
(Haha, don't worry, that last photo is just my friend joking around! Above 3 photos are guest photos)

I know most of these photos won’t mean as much to everyone else as they do to us, but I love looking back at everyone just hanging out and enjoying themselves!

That's because during our planning time, I sort of felt like there was a lot of pressure to make our reception "conform" and fit the more typical format of having lots and lots of dancing. But that just wasn't us. So we didn't do it! Sure, a dance or two more mixed in would have been fun, but overall, I'm happy that we ended up having a "let's hang out, drink and catch up" type of reception. It’s definitely true that you can have a wedding reception without a lot of dancing that is still a blast, it’s up to you to set the tone of the reception that you want.

Of course we did more than just stand around, talking and drinking. Our fauxtobooth was still going strong:
(Above 3 photos are guest photos)

And our wedding wasn’t completely devoid of dancing, some people were breaking it down on the dance floor, especially after the open bar had been busy all night! :)
(This above photo might just be my favorite of my FIL ever!)

Also, because our reception was more like a cocktail party, we got a ton of great group shots and posed photos of our guests.
(Above 5 photos are guest photos)


That about sums up the later part of our reception. Again, it's up to the bride and groom to set the tone of your reception, and if what you want to do resembles a cocktail party or nice dinner party, just go for it! You guys enjoying yourself, and making your reception be a reflection of who you two are is what is important. Your guests will grab a drink, put on a silly hat from the fauxtobooth, and follow suit!

What type of tone are you hoping to set at your wedding reception?

Miss any wedding week details? Catch up here:

- I packed an emergency bag that saved my dress

- We had a crazy 4 days prepping for house guests and stuffing favors
- Shopping for a ton of wedding flowers to arrange ourselves
- Mr. Cola drinks a 40 and I have a night out on the town for our low-key bach parties
- A day of DIY'ing flower arrangements
- I kicked off our official recaps with my #1 wedding tip
- We began the weekend festivities with a sunset cruise for our wedding party
- We rehearsed our quick and easy ceremony
- I panicked, but we got our rehearsal dinner decorations set up just in time
- Our families met for the first time at our rehearsal dinner under the trees

- What went wrong on our wedding day, and my tips for future brides
- My bridesmaids and I got our hair and makeup done in the hotel suite
- I put on my wedding dress and became a bride
- The guys watched the World Cup, then got ready in 10 minutes
- Traffic delayed our decorations getting to the venue, and I almost ruined our first look
- We got to see each other for the first time on our wedding day at our first look
- We took some time for bride and groom pictures in the park
- I gave you a behind the scenes look at our family, friends and DOC setting up our venue

- Arriving at our venue and getting ready for the ceremony to start
- Everyone walked down the aisle
- Excerpts from our ceremony, and reading the vows we wrote for each other
- I interrupted our officiant, we exchanged rings, and with a kiss we were officially married!
- Wedding party and family portraits, and my thoughts on missing pictures
- Our guests enjoyed cocktail hour while we took a few more photos
- Everyone ate a delicious dinner, and our siblings gave beautiful toasts
- We didn't practice, but we had a very special and wonderful first dance as husband and wife
- I showed you some disposable camera pictures, which were totally worth it to include on our tables!
- I found a target and tossed my bouquet at her
- Mr. Cola finally managed to find my garter under my dress and tossed it
- We fed each other cupcakes, and our guests swarmed our 6ft tall cupcake tower
- We stole some private moments together that our photographers documented

- All our guests had some fun taking pictures in our DIY fauxtobooth

(Unless otherwise noted, all photos in this post were taken by the very talented photographers of Shoot Me Now Photography)

Tuesday, November 9, 2010

A Woodside Wedding: Fauxtobooth Fun

From the time dinner ended, there wasn’t a moment all night long that our fauxtobooth wasn’t packed. So I’ll give my tip early in this post: if you’re considering renting a photobooth, or making a quick and easy fauxtobooth, just do it!

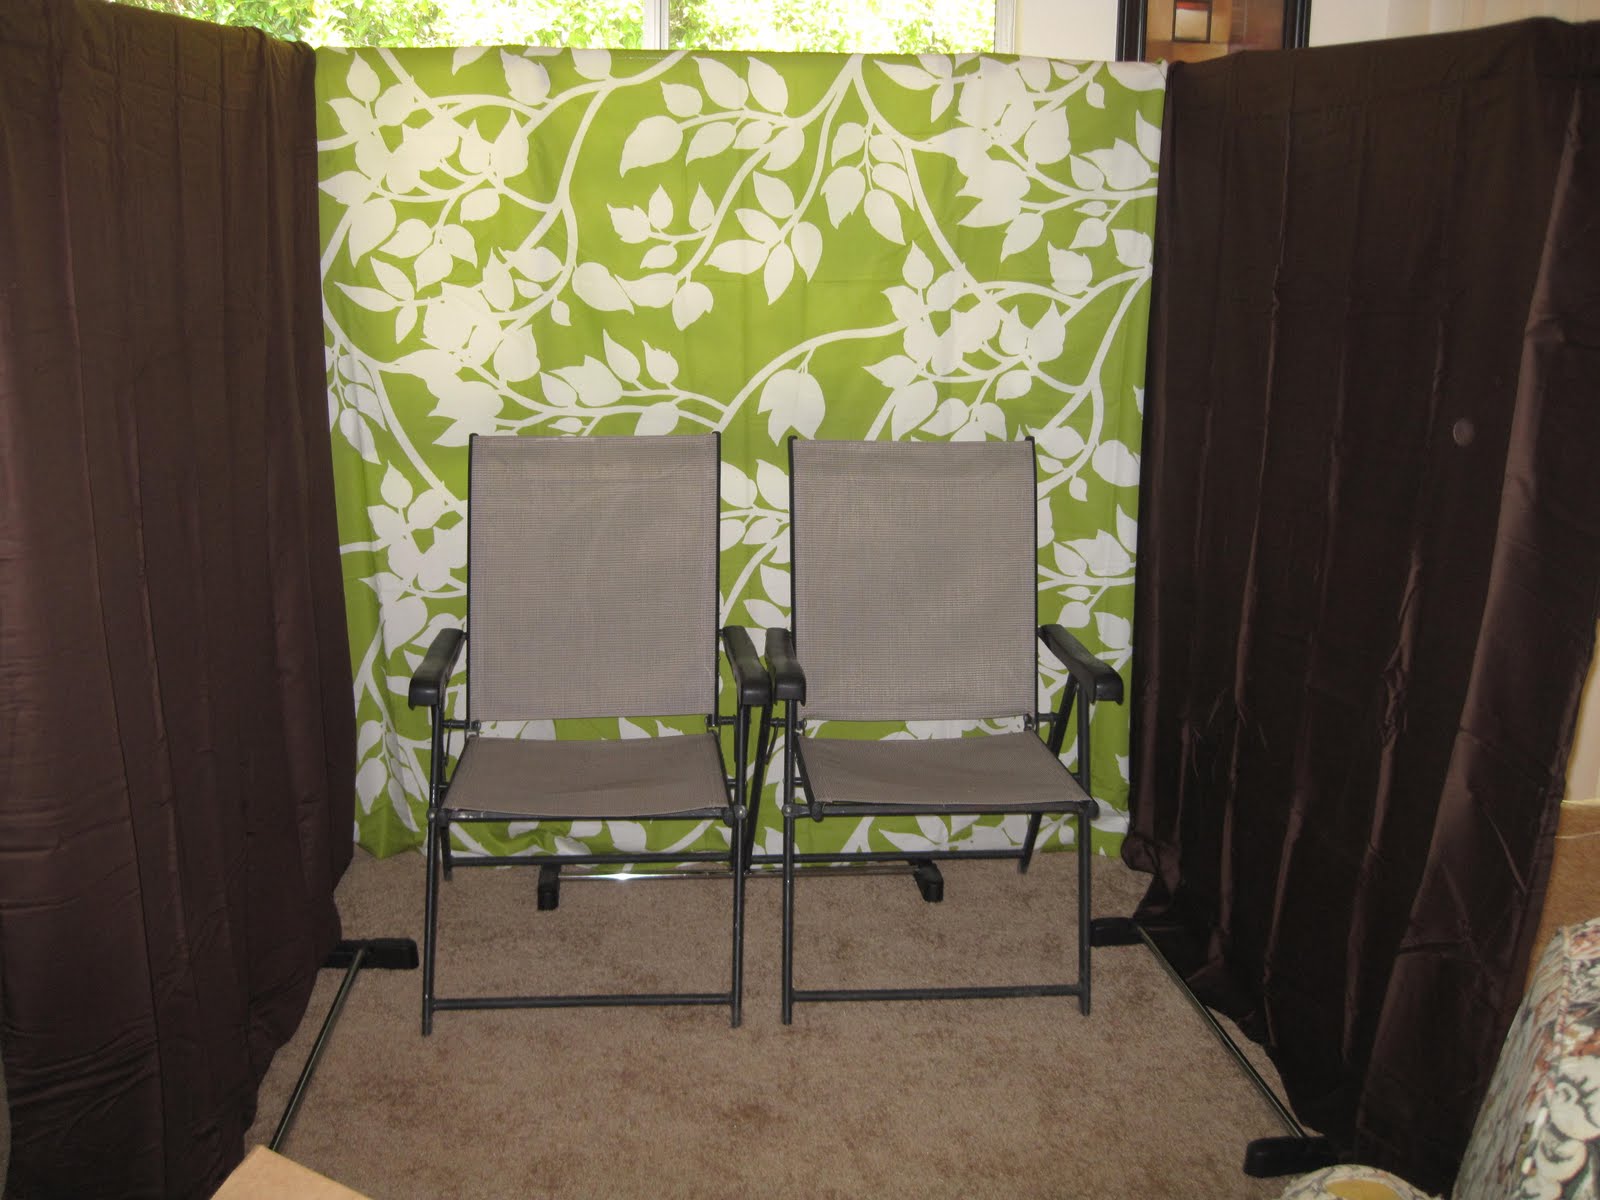
Ours was the quick and easy fauxtobooth version, which I detailed constructing here. Basically I just wanted to use stuff I already had, so I used three garment racks from my closet, and sewed a few snaps on sheets that were draped over the top for the sides and background. We used my sister’s Mac, which has a photobooth program on it, and webcam, and just instructed our guests to download their photos from our wedding website the next day (we also printed out one of their photos and included them in our thank you cards).

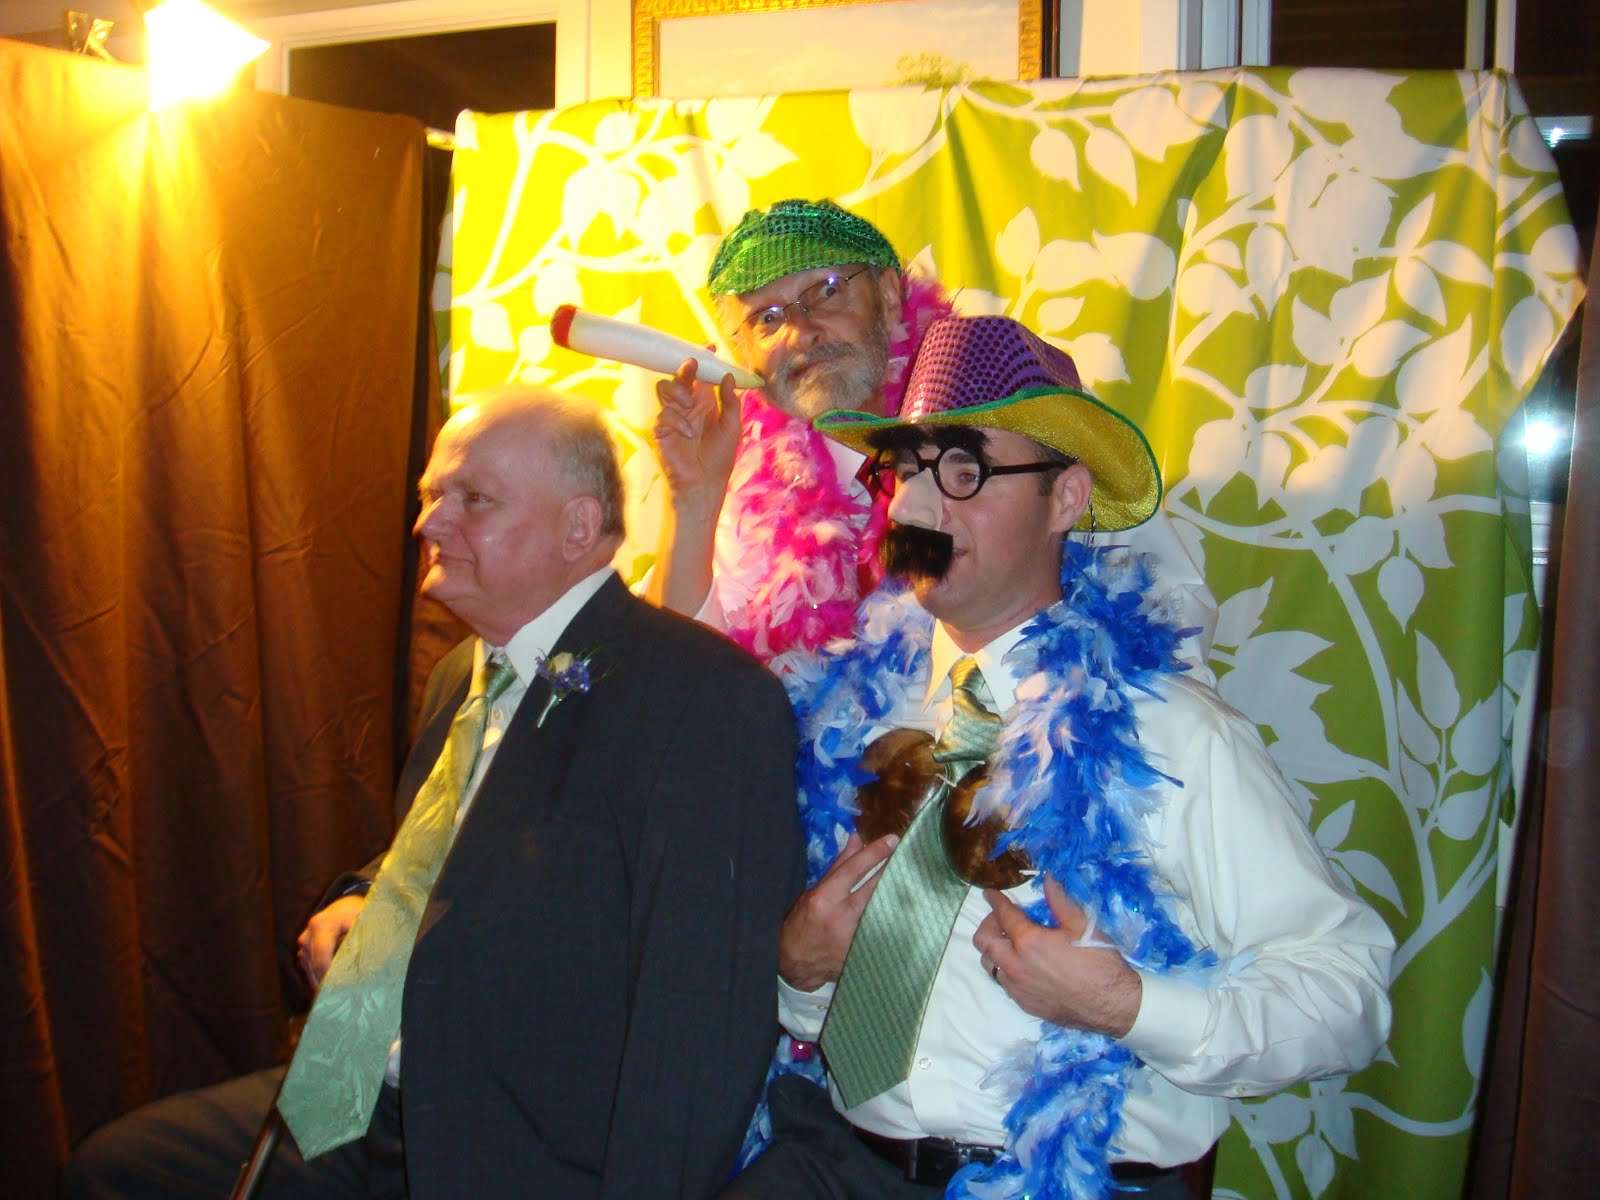
And I must say, the fact that our booth wasn’t fancy at all (in fact, the garment racks got bumped all night, messing up the sheet background repeatedly, and the lights I provided weren't quite set up right, giving a weird glare to the photos), or that we didn’t have the photos printed out on site, didn’t matter one bit to our guests. So if the logistics of a DIY photobooth are concerning you, don’t let it! Playing with the many props (that we got for cheap after Halloween last year) and getting to see the silly pictures they were taking on the 21 inch monitor we provided was plenty of entertainment for our guests. They couldn’t get enough of it, as evidenced by the couple hundred photos they took, and I’m so glad we decided to include this little project. Plus, getting to see all the hilarious photos the Sunday night after our wedding was just icing on the cake for us, since they were the first photos we saw from our wedding.

But enough gushing about how much fun everyone had in our fauxtobooth, let’s see some pictures!

First, some photos taken outside the fauxtobooth, by our photogs and guests--we all loved playing with the props!


Now for some photo collages from the fauxtobooth!
(You can see our lovely DOC straightening the background sheets in the bottom right above photo, people were so eager to take their photo that they kept messing up the background!)

(Surprisingly a ton of the older people at our wedding loved the fauxtobooth action, including my dad! I think he has more pictures in the booth than anyone because he didn't want to move, haha!)


I made the above collages in Picasa, which has a lot of neat features to arrange large numbers of photos. I think doing a large collage like these below might be fun, printed out poster size to hang in our spare bedroom!

Are you planning to rent a photobooth, or build a DIY fauxtobooth for your wedding?


Miss any wedding week details? Catch up here:

- I packed an emergency bag that saved my dress

- We had a crazy 4 days prepping for house guests and stuffing favors
- Shopping for a ton of wedding flowers to arrange ourselves
- Mr. Cola drinks a 40 and I have a night out on the town for our low-key bach parties
- A day of DIY'ing flower arrangements
- I kicked off our official recaps with my #1 wedding tip
- We began the weekend festivities with a sunset cruise for our wedding party
- We rehearsed our quick and easy ceremony
- I panicked, but we got our rehearsal dinner decorations set up just in time
- Our families met for the first time at our rehearsal dinner under the trees

- What went wrong on our wedding day, and my tips for future brides
- My bridesmaids and I got our hair and makeup done in the hotel suite
- I put on my wedding dress and became a bride
- The guys watched the World Cup, then got ready in 10 minutes
- Traffic delayed our decorations getting to the venue, and I almost ruined our first look
- We got to see each other for the first time on our wedding day at our first look
- We took some time for bride and groom pictures in the park
- I gave you a behind the scenes look at our family, friends and DOC setting up our venue

- Arriving at our venue and getting ready for the ceremony to start
- Everyone walked down the aisle
- Excerpts from our ceremony, and reading the vows we wrote for each other
- I interrupted our officiant, we exchanged rings, and with a kiss we were officially married!
- Wedding party and family portraits, and my thoughts on missing pictures
- Our guests enjoyed cocktail hour while we took a few more photos
- Everyone ate a delicious dinner, and our siblings gave beautiful toasts
- We didn't practice, but we had a very special and wonderful first dance as husband and wife
- I showed you some disposable camera pictures, which were totally worth it to include on our tables!
- I found a target and tossed my bouquet at her
- Mr. Cola finally managed to find my garter under my dress and tossed it
- We fed each other cupcakes, and our guests swarmed our 6ft tall cupcake tower
- We stole some private moments together that our photographers documented

(Unless otherwise noted, the photos in this post are personal, taken by guests or in our fauxtobooth)

Sunday, May 23, 2010

Fauxtobooth Mock Up!

Since last week I saw a post on the boards asking about how to make a DIY photobooth, I decided to share our fauxtobooth in it's mock up stages, instead of waiting until after the wedding when we'll have the pictures from it. I had to set it all up so I could write up the assembly instructions before packing it for the wedding, and thought it might be helpful to others thinking about doing their own photobooth!

I already mentioned the USB button we will be using to control the photobooth program on my sister's Mac here, and here I showed you all the fun props we got.

But as far as supplies other than the USB button, Mac and props, we're using the following to construct our fauxtobooth:

3 garment racks
3 queen size top sheets
Snaps (to hold the sheets on the racks)
2 clip lights
2 chairs (from our venue)
2 tables (also from our venue)
Large LCD computer monitor
High res webcam
1 small table for holding USB button
Wood box, with sister's laptop inside, LCD monitor on top (back of box is open for laptop fan circulation and cords)
3 signs
USB extension cord
Power extension cord
Double sided tape (for securing USB button to table)

Before doing the full mock up, I made this quick and dirty 'bird's eye view' diagram, so I would have a clear idea of where to set up everything (click for a larger view).


Now, I won't bore you with all the step by step photos I took (I'm guessing you all don't care to see how to assemble a garment rack, or the precise draping of the sheets on the racks), so I'll fast forward to the photos* with things more set up.

*Please use your imagination when looking at these rough mock up pictures. The real version with linen covered tables, nice chairs and non-wrinkled sheets is going to look a lot better, I promise! ;)

The quick and abbreviated set up instructions:
1) Assemble garment racks, adjust to head height, and drape sheets over the top.
2) Snap the snaps on the sheets, and form three sides of a square with the racks.
3) Place 2 dining room chairs in the booth (the actual chairs we'll be using are smaller than the ones in the picture, and don't have arms, so more people can cram together on them)


4) Place "Press button, smile, repeat" poster on table, facing the chairs, along with laptop, box over laptop, and LCD screen with high res webcam on top of box. Place "Photobooth" poster in front of table. (in the picture below, kindly imagine that the barstools are really a table with a nice table cloth on it)
5) Put the small round table right next to the chairs, with the button on top. Run the USB extension cable around the outside of the garment racks and up to the front table.
6) Clip the lights to the top of the racks, toward the front. Turn them to directly face the chairs, not pointing down. (The lights are not pictured below, and there won't be a window shining light through the sheets in our real set up.)

7) Lay out the props and prop sign on the side table. (We'll just pretend this box is a big table that covers the garment rack legs, ok? And that we have 10x as many props on the table.)

8) Adjust the webcam so that only the green back drop is in the frame of the pictures, and take some test pictures to make sure all is working correctly. (I obviously didn't follow step #8 in lining up my sample photos below, but on the day-of, the brown side sheets won't be showing)
(I made 2 chalk board conversation bubbles with wood and chalk board spray paint. The lavender round table you see between the chairs is where the USB button will go, but I used my wireless mouse in this mock up. Also, in the real version, you won't see the garment rack legs through the sheets, it's only there in these pictures because I stupidly did my mock up in front of a window!)


Once I was finished playing in the fauxtobooth with my kitty, I packed everything away as compact as possible for transportation to our venue. Minus the LCD monitor, sister's laptop, webcam and the USB button itself, which I don't have at my house, all but the garment racks fit nicely into just two boxes.
I'm guessing that on our wedding day, it won't take my sister more than 15-20 minutes to get this all set up, especially with my (much more detailed than this post) set up instructions sheet.

We've included a note about our fauxtobooth in our programs and on our wedding website, and you can't miss seeing it on your way to the restrooms, or through the big windows from the deck/dining area, so hopefully our guests will put it to good use! The next day we'll upload all the photos to our site for everyone to download, and we also plan to print out some of the pictures of each guest on photo paper and include them with their thank you cards. It will be like getting another favor after the wedding is over!

Is anyone else jumping on the fauxtobooth bandwagon?