skip to main |
skip to sidebar
Alright, so I got lazy. Not as lazy as I could have been, but still, pretty lazy. We had a few people that never got their addresses to us, or were late additions to the guest list that I still needed to get Save The Dates out for. Eight people, to be exact. But I didn't want to give up my extra STD that I made for myself, nor did I feel like making more pocketfolds, since I was still pretty burnt out from that project. So I cheated.
I made simplified STDs, still carrying out our theme, but these only took me a couple hours to make. I started with the same green card stock from my elaborate STDs, and cut them into single sheets measuring 5" x 6.5". I then took my 11" strips of chocolate and purple ribbon (I had leftovers already cut) and glued those around the center of the green card stock. After that I simply layered the purple card stock with our date over the ribbon, and then attached the STD magnet and an insert on butter cream card stock with 4 photo corners.
And here is what they looked like:
 Now, with the magnet taken off, but the cream insert still there:
  And with the cream insert removed:
 The back side:
  These aren't too bad, right? Better than just throwing a magnet into an envelope, which I did consider doing for these last few. Actually, in retrospect, I probably should have done these simple STDs for everyone in the first place. It would have saved me a ton of time, and I wouldn't have set the bar quite so high for the invitations. Oh well, what can you do!
Now, wanna see what I did with the leftover magnets?
 Seriously, this is like only half the leftovers! So if anyone needs extra magnets....you know who to call!
Did you end up cutting corners on any of your DIY projects, in the interest of saving time, or just because you were lazy?
These babies are stamped and sent!


I just dropped them in the mailbox this morning:

Now, before we dive into the cost breakdown, let's have one last look at the entire suite:

Alright, now on to the not-so-fun stuff, the cost of these STDs. I didn't include the corner rounder, flower punch, x-acto knife or cutting mat in this, because I will be using them for other projects. I also didn't include the price for the full pack of paper, etc, I did it by the cost per sheet of paper used, because I will also be using the leftovers for other things. So here is what I spent on these, $3.54 each before postage (click the chart for a clearer image).

Perhaps a tad on the expensive side for STDs, I think this is more along the lines of the cost of the real invitations for most people, but oh well! I said from the beginning that I wasn't DIY'ing things just to save money, and I'm still super happy I did these Save The Dates the way I did. They're all me, baby! I love the fact that none of our guests will have ever seen STDs like these before, so the cost is well worth it in my opinion! Also, I should note that the guy at the post office didn't point out until I was swiping my debit card that the stamps he was having me buy were $0.20 over what I needed. So there was an extra cost there, but oh well.
Did you over spend on a wedding item, but were happy with the decision?
After my (almost) math screw up, it was time to add one last touch to the STD cards: belly bands! You knew all that ribbon had to have some purpose!
In comes the handy ruler, brand new scissors, and the ribbon I got from Michaels:
 11 inches x 82 of the chocolate grosgrain ribbon cut:
  And another 82 of the purple satin ribbon:
 Next I glued the ribbon together with some Zip Dry:
 Making sure that one end had both ends of the ribbon lined up exactly:
 I then broke out the handy lighter again and quickly ran the flame over the lined up end, so it wouldn't fray.
 Then I wrapped the ribbon band around the cards and glued it with the lined up and melted end on top:
 Now, doesn't that look better!? And now people will have to slide the band off to see who they're saving the date for (if you remember, our names are under where the ribbon band is).
 So, done, right? Haha, just kidding! These needed one more thing to complete them:
 Punched flower embellishments! I did all the ones out of the 65lb purple paper, but Mr. Cola was kind enough to do the 111lb green ones because it was too thick for me to punch. I then glued the green flowers behind the purple, so they looked like leaves.
 Here is a close up:
 And voila, I was done!
 These turned out awesome, and were soooo worth all the time and effort! But, you may be asking yourself, how was I going to send these to people? Well....I only said I was done....LOL!
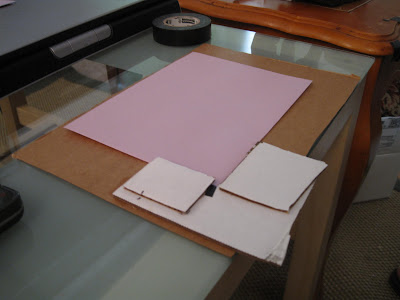
While I was doing all the ribbon and paper flower gluing, Mr. Cola was being helpful for once, and he can take credit for our envelopes! He started by spending about an hour making a guide out of cardboard, so he could easily line up the laser cut stamp with the envelope (don't ask me why it took an hour to set this up, but as long as he was helping I wasn't going to question his methods!)
 The finished stamp guide, ready to be used:
 Ink:
Ink:
 Line it up:
 Press (and yes, I know all these stamping pictures aren't necessary. But DIY wedding help is hard to come by from Mr. Cola, so I'm documenting it all, haha!):
 The stamped front:
 Stamping the return address on the back of the envelopes:

 And done. For realz! With a clear address label.
 Next up, I'll do the cost breakdown (this might be a scary one....!).
Did your fiance help you with any DIY projects when it got down to the deadline to get something done?
So in my last post you got to see how I made the pocket folds, now let's see what went in those suckers!
I wanted to include some basic things: the date, the location, info about the accommodations and the discounted room block, and of course a snazzy magnet so people would remember everything. I also knew I needed a cover of some sort and two inserts (otherwise, why bother with the pocket!). It was a bit of a stretch....I didn't REALLY need two inserts, so I basically duplicated the info from the magnet onto the front insert, and put the accommodations and website info on the second insert.
I laid everything out on one sheet of this butter cream card stock (it is the same weight and texture as the green pocket fold, and much lighter in real life than pictured on the website). I then flipped the paper over and printed cutting guides on the back side. I did the same with this purple lighter weight card stock, for a layer under the butter cream. I then (crazily) tried to cut these with my paper cutter.
Mmmmkaaayy, not so much! I HATE my cutter, it just doesn't cut anything straight, and is hard to line up. So I gave that up pretty quickly, and called up my "good friends at Kinko's" (I call them that because we give them like $100k in business a year through my company with last minute printing, so they know me pretty well). For only $19.54 they could cut everything for me, saving me about 20 hours of time!
And here are my beauties after coming back from Kinko's, with the purple card stock glued under the butter cream, opposite corners rounded with my precious corner rounder (edited for privacy):
 (top left is the cover, top right is the second insert, bottom left is what will go behind the magnets, and bottom right is the front insert)
The only problem I had, and I'm not sure if this was Kinko's fault or my printer not printing consistently, but I did have several sheets that were cut too close to the edge. In this picture you can see the cream sheets stacked under the purple and cream layered sheets, that is how many were too messed up to use from each stack, and I had to go back and hand cut new sheets with my x-acto knife.

The other piece to these were my magnets. I looked online at several companies that made custom ones, but ended up going with Custom-Magnets.com. They had the best pricing I found, for 250 magnets no less (250 was still cheaper than the 100 I needed!). Plus, they sent me a couple samples before I ordered, so I could make sure they were high enough quality. I hate it when I get magnets that won't even hold up a single piece of paper, and totally didn't want to send people cheapies! Here is the final product:
 (don'tcha love how they match the design of our wedding website?)
Next came the fun of gluing the covers onto the pocket folds, gluing the under the magnet sheet, and putting the inserts in the pocket. I seem to have pretty much taken over our TV room with my wedding stuff.....!

And without further ado, here is the (mostly) final product! The cover:

The inside with the magnet attached with photo corners:

And the inside with the magnet removed (I stole the idea of the fun surprise of the date under the magnet from this post):

Now, it would seem that these are done and ready to mail out, right? But no, see, my craziness just keeps on going, and since these are already overly elaborate, I had to go one step further, which I will share in my next post!
How much information did you send with your Save The Dates?

 Now, with the magnet taken off, but the cream insert still there:
  And with the cream insert removed:
 The back side:
  These aren't too bad, right? Better than just throwing a magnet into an envelope, which I did consider doing for these last few. Actually, in retrospect, I probably should have done these simple STDs for everyone in the first place. It would have saved me a ton of time, and I wouldn't have set the bar quite so high for the invitations. Oh well, what can you do!
 Seriously, this is like only half the leftovers! So if anyone needs extra magnets....you know who to call!




 Posts
Posts