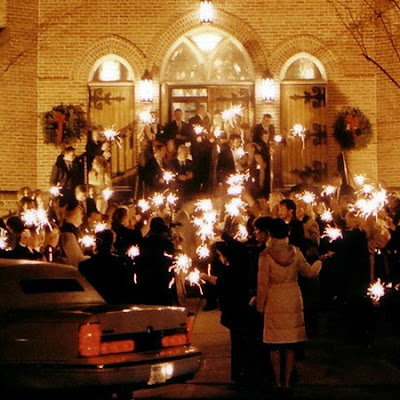
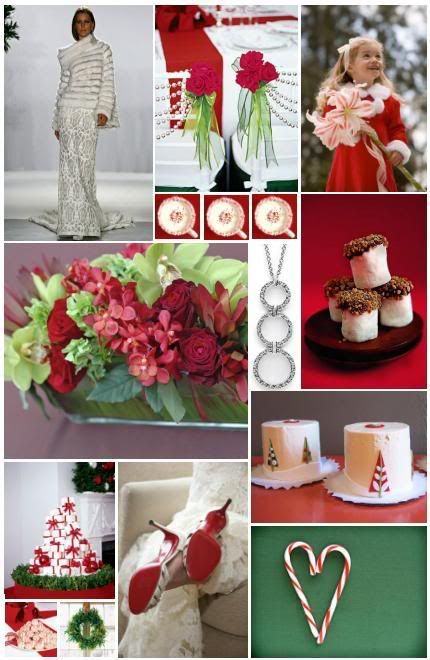
Happy New Year's Eve everyone! I completely agree with the Everyday Bride, I would really enjoy attending a wedding on NYE, instead of the usual packed bar scene. I love the inspiration pictures she shared last year!
Selecting our wedding officiant was pretty easy for us, although I know many couples who this is difficult for. But for us, it came down to figuring out what friend of ours, who isn't in the wedding, would be good at it!
We never even considered a pastor/priest/religious figure, since we aren't religious ourselves. And even the justices of peace and other non-church affiliated officiants in the area were pretty expensive, the lowest I found was around $400. For about an approximately 16 minute ceremony, that was pretty steep. So we decided to ask one of our good friends to do it, and I know we will be very happy with our decision. He's totally cool with us writing everything he has to say, he's great at public speaking, and he's a really fun, entertaining guy. He even took the initiative to get ordained online right after we asked him to be our officiant! (even though it appears in our county they don't actually verify if your officiant has been ordained or not)
(personal party photos, heehee!)
And here is a rough draft of the ceremony I have so far, taken in bits and pieces from all over the web.
Officiant: Ask everyone to turn off cell phones and other noisy electronics (before everyone walks down the aisle)
Family and friends, I welcome each and every one of you, and thank you for coming today to witness the marriage of Morgan XXX and Alex XXX. It is a privilege to share such a happy occasion.We are here, not only to witness the vows and promises you’re about to exchange, but also to wish you both the very best life has to offer, in your future together as husband and wife.
We come together, not to mark the start of your relationship, but to recognize the bond that already exists between the two of you.Throughout history, what people have found that is essential for a strong and long-lasting relationship is that it be founded on what we call "love".
I think it's important that we consider this today because, after all, if you did not love one another, none of us would be here today. You would not be about to say your vows in a few minutes if you did not love one another. You would not be about to sign your names on a piece of paper and recording that you are now officially husband and wife, if you did not love one another. So, as important as this ceremony is, it's important that we recognize that the foundation of your marriage was formed long before we ever came here today, and that is the love that you share.
But we hear all kinds of definitions of what 'love' is, on TV, on the Internet, in books and newspapers.... So for the definition of what I'm talking about today, I'd like to read this:
Love is a friendship that has caught fire. It is quiet understanding, mutual confidence, sharing and forgiving. It is loyalty through good and bad. It settles for less than perfection and makes allowances for human weakness. Love is content with the present. It hopes for the future and it doesn't brood over the past. It is the day-in and day-out chronicle of irritations, problems, compromises, small disappointments, big victories and working toward common goals. If you have love in your life it can make up for a great many things you lack. If you do not have love in your life, no matter what else there is, it is not enough. So search for love. Share it. But most of all...ENJOY IT.
Now, Morgan and Alex, you've gathered your friends and family together to celebrate this special day with you. There's no doubt that you will be receiving some advice today. But I believe I speak for every witness here when I say:
Let your love be stronger than your anger. Learn the wisdom of compromise, for it is better to bend than to break. Look for the best in your beloved rather than the worst. Confide in your partner and ask for help when you need it. Remember that true friendship is the basis for any lasting relationship. Give your spouse the same courtesies and kindnesses you bestow on your friends. Say "I love you" every day.
And so here you are today, to say your marriage vows to one another.Alex, please go first.
Alex: (reads his written vows)
Morgan: (reads her written vows)
Officiant: With these promises to each other in mind, Alex do you take Morgan to be your Wife? Do you promise to love, honor, and cherish her for all time?
Alex: I do (at least that's what he better say, lol!)
Officiant: Morgan, with your promises to Alex in mind, do you take him to be your Husband? Do you promise to love, honor, and cherish him for all time?
Morgan: I do (hellz yeah!)
Officiant: May I have the rings, please?Please place the ring on her finger and repeat after me:Morgan, I give you this ring, as a daily reminder of my love for you.
Alex: (repeats) Morgan, I give you this ring, as a daily reminder of my love for you.
Officiant: Morgan, please place the ring on his finger and repeat after me:Alex, I give you this ring, as a daily reminder of my love for you.
Morgan: (repeats) Alex, I give you this ring, as a daily reminder of my love for you.
Officiant: Morgan and Alex, you have made your marriage vows to one another, witnessed by your friends and relatives. You have sealed your vows with the giving and receiving of these rings. So now, by the power vested in me, I pronounce you husband and wife and invite you to kiss one another.
(big smooch!)
Officiant: Please put your hands together…..Congratulations to the newlyweds!
Will you be writing, or have a hand in writing your ceremony? And how did you pick your officiant?
After nailing down our venue last spring, we knew we needed to really have a plan for our ceremony music, since amplified music isn't allowed outside at the ceremony (but we do get a small mic and speaker so people can hear our vows).
I did some initial research into acoustic bands, but quickly realized they were just out of our budget, considering we only needed someone to play for about 10-15 mins before the ceremony, for our processional and the recessional. So about a half hour max the day of. I then started researching acoustic guitarists, but the cost was still going to be about $400, which just seemed like a lot to me. However, then my MOH/Sister volunteered her long-time boyfriend, who is an amazing guitar player!
For some free headphones that my company makes (and that I get a 70% discount on), he'll take care of all our acoustic music needs for the ceremony, as well as DJ (aka, run my computer playlists, with backup MP3 player) for us during the reception! Score, another friendor to the budget rescue!
He's been practicing for months, and I finally just got samples of the two most important songs, the processional song that our wedding party will walk down the aisle to, and the song that I'll walk down the aisle to.
I have a very deep love for Ingrid Michaelson, just like Mrs. Powder Puff, so our parents and wedding party will be walking to an acoustic version of "Keep Breathing."
Next, I will be walking down the aisle to one of my all time favorite songs, "Satellite" by Dave Matthews Band (the first 32 seconds of the song, repeated a couple times). Once he adjusts the speed, it will transition very nicely from "Keep Breathing."
(these last two videos were taken by our guitarist)
I'm still not sure what song we'll pick for the recessional, but I want something upbeat and happy, maybe like Weezer's Island In The Sun (although I might be tempted to sing the "Hip Hip" parts as we walk down the aisle, married!). I can't really find a good acoustic version of the Weezer song, this is as best I can find (after the dude talks for 5 seconds), but our friend's version will be much better.
{Source} After that, all that's left is to figure out what to have him play while everyone is getting seated before the ceremony. I'm thinking about just leaving it up to him to play whatever....as long as it goes with the mood, and will transition into our processional songs without a hitch, I'll be happy!
Will you be having any live music at your wedding? And how did you find your musicians?
Well, since I hope my Secret Bee has received her package by now, I can share with you my holiday DIY project (really, my only holiday anything, other than a few cards and a string of lights along the gutter of our house).
All of the Bees got together and did a holiday ornament exchange, but a few of us joined the hive too late to participate, so Miss Cheeseburger got 6 of us 'newbees' organized to do our own ornament exchange. We set a $10 limit, and used Elfster.com to randomly draw names. And I got Miss Cheeseburger!
I started by making a card, using a very similar method as I will for our wedding invitations, laser cutter + layered paper. I will be doing something along these lines, but with our flower and vine motif on the cover:
For the inside, I laser cut the white card stock that acted as the bottom layer of the cover, for a reverse white on blue effect. Our invitations will have a similar feel as well, with more laser cutting on the inside, but the invites will likely be a tri fold with a pocket.
Since it was a Secret Santa gift exchange, I made a little flap at the bottom of the card, which when lifted, "revealed" who the card was from.
(isn't the Cola icon adorable with a little Santa hat?)
Next I made a sorry attempt to DIY a holiday ornament, with a cheeseburger on one side and a bee on the other side. Again, Miss Cheeseburger, I apologize for how lame these turned out. The laser cutter is usually much more cooperative, but I went through 2 packs of cheap plain ornaments from Michaels, before I had to switch to an outline version of the cheeseburger; the filled version of the icon just cracked the glass.
You can kind of see the bee on one side and cheeseburger on the other in this picture, taken right after the laser etching. Sadly, with that thin/cheap of glass, we just couldn't do a deeper/bigger/more visible etch. :(
Then, to make matters worse, I had to decorate the ornament. I had seen cute ones just stuffed with tinsel, so that's what I did, with multi-colored tinsel. Actually, it didn't look that bad, except for the fact that you couldn't even really see the etched designs on the ornament. Fail. I'm too ashamed to even take a picture.
Luckily I had a back up etched ornament, so I decided to just hang 3 little snowflakes inside it. Still, it looked pretty lame, like a cop-out, since it took hardly any effort, and wasn't that decorative. But at least the glass etchings were a little more visible.
So sorry Miss Cheeseburger! Because neither the tinsel stuffed one or the hanging snowflake one turned out that great, I sent both....maybe two lame ornaments equal one alright one though? Hopefully the extra touches on the holiday card, and the box of Ghirardelli chocolates help make up for it.
I seriously need to stick with just DIY'ing paper goods. I will definitely not be attempting laser etching glass again anytime soon!
Did you DIY any of your Christmas gifts? And have you used the design concept for your wedding invitations for other purposes?
Quite a while ago I lamented over what to do for our table numbers. Luminaries wouldn't work because it would still be pretty light outside at dinner time, and I just wasn't too excited about anything that I'd seen in the way of table tents or metal holders. Frames didn't really work for the feel of the tables either, and pretty much the only thing I'd seen that I liked was a plain and simple number, thanks to Martha:
So I set out to find my own wood numbers, but it proved more difficult than I anticipated! There are a ton of options online and in hardware stores for use as house numbers. But the problem was that I needed numbers that were at least an inch thick, so they wouldn't tip over when the table is bumped, and all I could find anywhere were ones that maxed out at 3/4" in the 4" height I needed. I did find some that were thicker in the 6-8" range, but those were too tall and would have taken away from my centerpieces. And sadly, we can't laser cut wood that thick, and I didn't want to do the numbers in layers, because they wouldn't look good from the side. I did come across these on eBay, which eliminated the need for the thickness I was looking for, but I just didn't care for the round bases.
So I turned to the next obvious source, Etsy! I put out my first alchemy request, and got several responses, but ultimately decided to go with Lizartestry. After several back and forth e-mails to clarify what I was looking for, along with her making trips to stores all across her town to find the right wood, she made these for me for $60: (photos courtesy of Lizartistry, here) Aren't they lovely? Combined with my table chart that will go on the escort card table, I think guests will have no problem finding their seats. I only got numbers 2-13, since I didn't think the head table needed one, but I wanted an extra in case we have to overflow to 13 tables. They're about 4 inches high (so won't overpower my smaller table arrangements that are in the 5-6 inch vases), and an inch deep, so won't fall over when the table is bumped. The font they're based on is called "Rosewood Fill," which was the closest I could find to the Martha version of the numbers.
The artist even offered to stain them for me, but I wanted to make sure they would match our wood grain paper, so I declined the kind offer. She also made the great suggestion that we should do something neat with the numbers that make up our wedding date, 6-12-10. I'm thinking of maybe putting them in a shadow box with some of our wedding photos or something, so it's great that I'll have a use for some of these after the wedding!
After receiving the numbers, I stained them with a Fruitwood stain, that is a very close match to the wood grain paper. Here are some shots I took with half of them stained, so you can see the contrast.
And the final versions of our wedding date, all nice and stained.
(last three photos taken by me)
I'm so glad to have put this table number issue to bed! I have no idea why I was stressing for so long about something so small, but I was.
What are you doing for your table numbers? And are you using an actual number, or going the named table route?
So, I'm not sure if putting disposable cameras on the reception tables is a dated trend or not. I never hear about anyone doing them on blogs anymore, but I still see the cheesy wedding decorated ones for sale online everywhere. Well, either way, I decided I wanted to do them! I'm also planning to ask everyone to upload their digital pictures for us, but I think enough of my family members still don't have digital cameras to warrant the disposable ones on the table. Plus, I've had some fun with them myself at weddings, and I'm hoping to get some interesting candids that we wouldn't get otherwise.
After making this decision though, I simply couldn't find a disposable wedding camera that I liked, and I didn't want to put ugly undecorated ones on my tables. So it was time for another DIY template!
I started by buying a 10 pack from Amazon of Fuji 400 speed cameras with the built in flash, for $34.75 before shipping, plus 1 extra camera from the drug store. We're hoping to have a total of 12 tables, and the head table doesn't need one, so 11 cameras should be just fine. Worst case we'll have 13 tables, and then the parent's table can sacrifice their camera!
After receiving my cameras, I carefully took the green cardboard sleeve off the camera, and taped it to my cutting mat, so I could photograph it with a reference to its dimensions.
Next, I opened the photo with Illustrator and resized it until it was to scale, with the inches on my cutting mat lined up with the ruler bar in the program, as shown in the purple circle below. You should be able to do this in Word, or any program that has a ruler bar.
I then traced the outline of the camera sleeve on top of the picture in Illustrator (see red lines below).
Next, I deleted the picture from Illustrator, leaving only the red outline of the sleeve, inserted my graphics, and printed the graphics on the front and the outline on the back (and be sure to make sure the printer doesn't scale it when you print, so the sleeve is the exact size you traced it).
I then just cut out the outline of the sleeve with scissors and used my x-acto knife to cut out the shapes in the middle.
Yup, I used the sexy wood grain paper for these too! I wanted to add another element in wood to the tables, and these cameras were the perfect opportunity. Then all that was left to do was glue them to the naked cameras. I used hair bands to hold them while they dried, which seemed to work well.
So there you have it, an easy way to make a template for custom camera sleeves, that will work with any type of disposable camera!
Will you be putting disposable cameras on your reception tables?
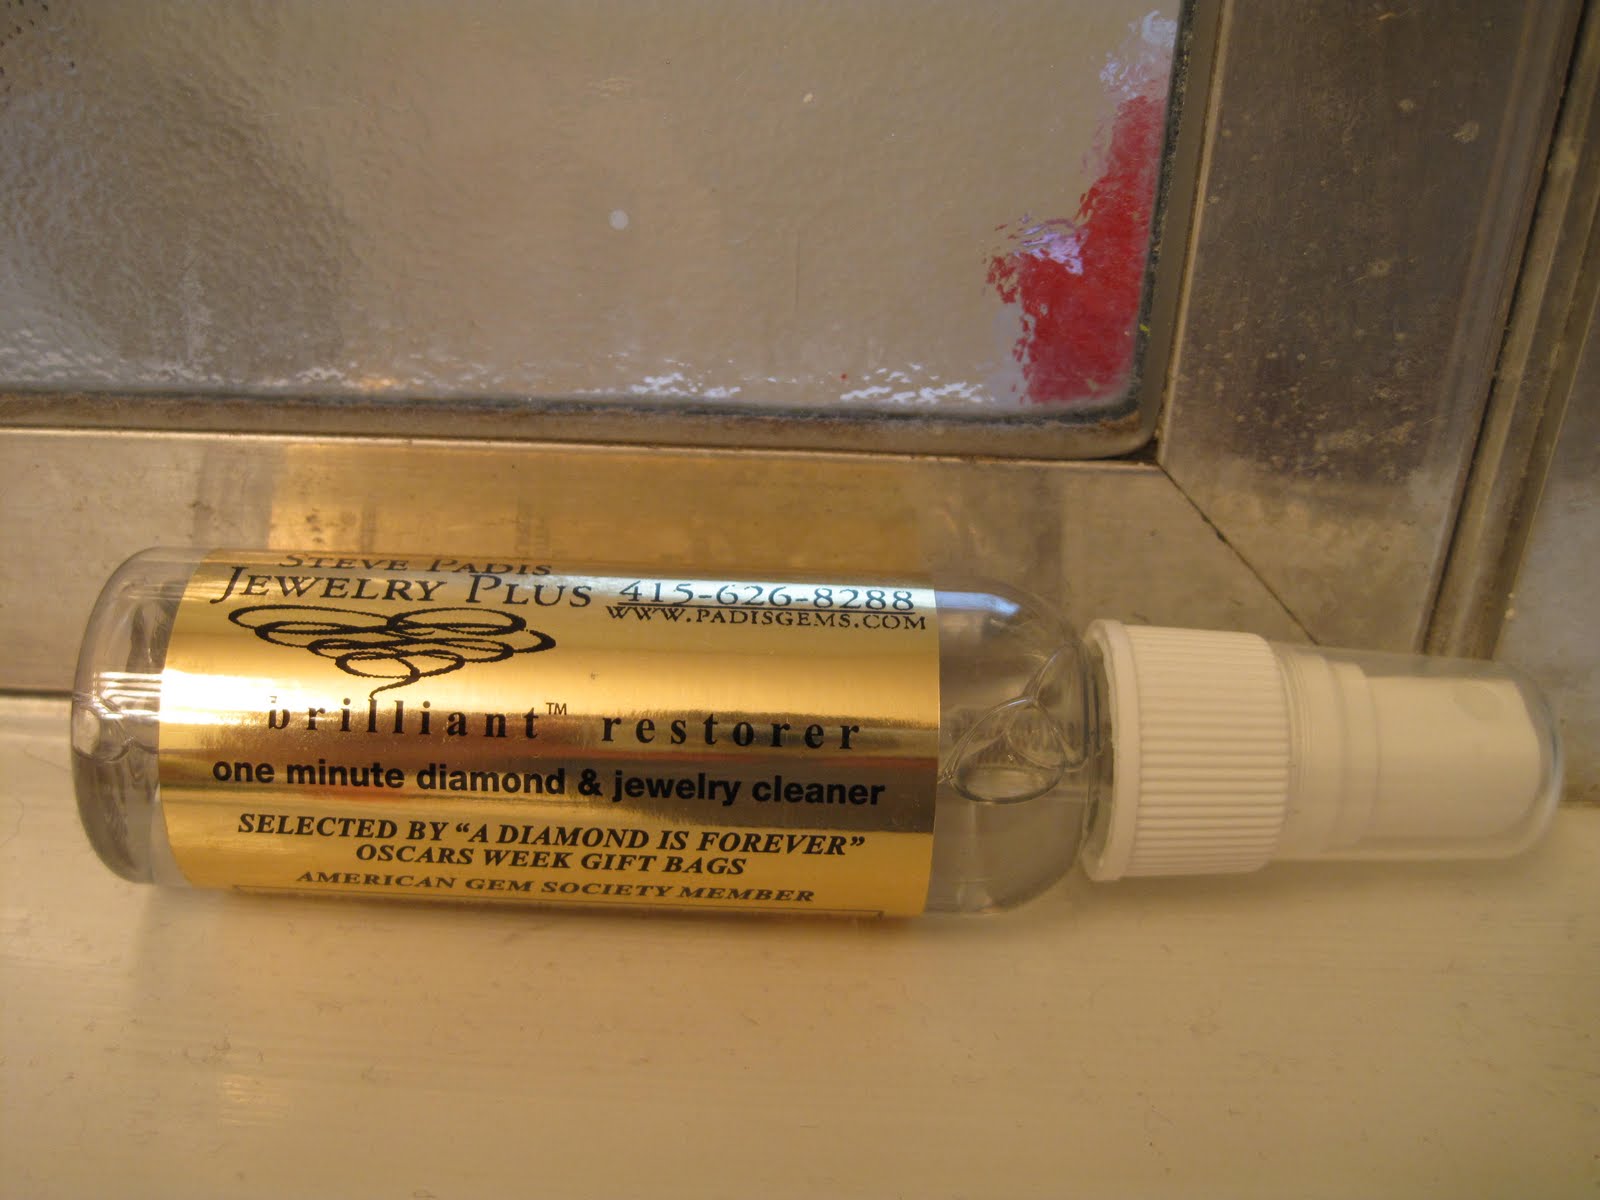
My engagement ring is nearly always not at it's sparkliest. I try to clean it at least once a week with a soft brush and cleaning solution, but I have these little pests in my house that keep dirtying it up:
Nearly every time one of my kitties come to sit on me, they get obsessed with biting at or licking my ring! It's just so pretty, I know it's hard to resist, but it's starting to get really annoying! I bought this ultra sonic jewelry cleaner a while ago...but as you can see, I haven't even taken it out of it's box yet. After purchasing it I read that sometimes they can make your pave stones fall out, so I'm a little reluctant to try it.
Instead I just use this cleaner that I got free from the jeweler who we bought our rings from. It seems to work pretty well, but I'm not sure what I'll do when I run out of it.
I know I can't be the only one with crazy pets who want to eat engagement rings, anyone got any tips on how to get them to stop obsessing? And how do you keep your rings shiny and new looking?
Warning, this post contains A LOT of pictures of me, including an unsightly one of me without any makeup on or my hair curled. You've been warned!
Alright, now if any of you are still reading, I'm ready to share my hair and makeup trial with you! I first started researching stylists and MUAs around the 10 months until the wedding mark. I knew this was going to be very important since I was going to be the center of attention all day (along with Mr. Cola, of course). My hair and makeup are super important to me on a daily basis, so the wedding day had to be extra special!
Enter Yelp, OnceWed, Project Wedding, Weddingbee, The Knot, every site I could think of to find reviews of bridal stylists in the area. I contacted several for their prices, and to find out if they're good with working with long hair, but one stuck out to me, Aimee Lam. At the time I'm writing this she has 29 reviews on Yelp, of which 27 are five stars, and the other two are four stars. And all the reviews were so glowing, I just had to have a trial with her!
I decided to go to the trial with my regular "day to day" makeup on, but without my hair curled. I really wanted something more special and glam for my wedding day look, since I wear a fair amount of eye makeup usually (I have a serious mascara and eyelash curler addiction!), and wanted Aimee to have a reference. These were the inspiration pictures I brought in:
(photos from The Knot, Brides Magazine, Google Images, and YouTube screenshot)
I also brought in these hair accessories, along with my bumpit:
(cheapie rhinestone pins from Claire's and a flowers from a silk flower stalk I got from Michael's for $9.99, photos taken by me)
Some pre-trial shots of me with my normal makeup on, but uncurled hair:
Upon arriving at Aimee's I sat down with her to go over the inspiration pictures I'd e-mailed her ahead of time, then I took off my makeup and she took this (scary!) shot of me:
(my Cover Girl Lip Stain was still on though!) Then Aimee got to work on beautifying me! She airbrushed my face, which I'd never had done before, but loved it. It felt so light and airy, hardly any different than the pressed powder I normally wear. She then gave me sexy smokey eyes, and applied false lashes. Aimee actually layered two sets of lashes on each of my eyes, one set that was longer and one set that was fuller, for a great full and long look! I would have never thought to do this, but am totally gonna try it next Halloween!
Next up was the long process of curling my hair. I have very coarse, thick hair, that curls well, but tends to hang itself out by the end of the day because of the weight, so I shared my concern with Aimee, so she knew to spray the heck out of it. It was then that I learned another neat trick, she used a smaller barrel curling iron on the bottom two layers of my hair, since those bottom layers usually go straight first. Another thing I plan to try at home, since I spiral curl my hair all the time for a loose wavy look! She then used a larger barrel curling iron for the top layers, and after everything was curled, she proceeded to pin my curls into a work of art, with strategically placed rhinestone pins and the flowers (my bumpit wasn't needed, but I still love it!).
And here is the final look!
(Aimee took these great pictures in her on-site photo studio, and e-mailed them, and lots more, to me later that night.)
I, of course, signed her on the spot to do our wedding, along with hair and makeup for my 3 bridesmaids. She'll be bringing an assistant too, since my hair alone takes so much time. I'm so excited, I know she'll do a fabulous job again on the wedding day!
And at the end of the day, after playing with my parent's dog, going shopping, changing my outfit, and leaning back on the couch to watch TV, this is how my hair held up:
(Not too bad in my opinion, a little frizzy and not as curly, but I did a lot of stuff while it was done, and didn't make an effort to be gentle with it, to see how it would really hold up to a night of dancing. And I think by the end of the night a more tousled look will go just right with my after party dress.)
Here's how the makeup held up. You can't really see it in these pics, but there was a bit of makeup gathered in a line in the crease of my eyelids. I'm used to this though because of my deeper lids, and a quick scrape with my fingernail takes care of it.
(Sick of looking at pictures of me yet? Yeah, me too!)
So all in all, a great trial, and I have my wedding look from the neck up all set! The only down side was it took Mr. Cola about 15 minutes to help me get all the pins out of my hair. Aimee really had them in there, which is great for the style, but will be a pain on our wedding night! 53 total pins were used, plus the accessories!
How many hair and makeup trials did you have before finding the perfect stylist? And did you try more than one look, or did you know what you wanted from the start?
I have a deep love for shoes, anything with garlic on it, and all things DIY. Just a West Coast chick adjusting to life in the South with my husband and 3 kitties. To pay the bills I'm a marketing communications professional, but my true love is crafting and working on decor projects. And now that we are homeowners, I love taking on bigger renovation projects side-by-side with my husband, as we strive to make our new house a home.
Unauthorized use and/or duplication of this material without express and written permission from this blog’s author is strictly prohibited. Excerpts and links may be used, provided that full and clear credit is given to The Handcrafted Hitching Post with appropriate and specific direction to the original content.


 (personal party photos, heehee!)
 {Source}


 (isn't the Cola icon adorable with a little Santa hat?)


 {Source}


 (Sick of looking at pictures of me yet? Yeah, me too!)


