skip to main |
skip to sidebar
My new toy!

Out of all the Wedding/Crafting things I could have bought (and would still love too), like the Cricut, Cuttlebug or Gocco, I think this was a better investment. And considering that my old printer that I did our STDs on is about 12 years old, I was in desperate need for an upgrade.
I bought the Epson R1900 Large Format Photo Printer from Amazon, after doing a ton of research on CNET, my favorite site for electronics reviews. Here's the capabilities I'll get to use (from Amazon):
The Epson R1900 sets a new standard in glossy printing. This powerful, wide-format printer offers incredible versatility so you can explore all your creative aspirations. With Epson UltraChrome Hi-Gloss® 2 pigment ink, the R1900 delivers vibrant photos up to 13 inches wide. Offering the highest level of media versatility of any printer in its class, this remarkable performer prints on a wide variety of media types including glossy, luster, matte and fine art papers. The Epson R1900 also includes innovative Radiance technology, co-developed by R.I.T., to maximize the color gamut while simultaneously optimizing print quality. Radiance technology reduces grain, provides smoother color transitions and ensures colors stay consistent in virtually any lighting condition. It also boasts incredible performance when it comes to higher resolution printing. So, explore your creativity and achieve superior results with the Epson R1900.
I'm super excited to try it out!
Did you buy an expensive new machine for your wedding DIY? And will you use it after the wedding?
During the wedding planning process you are bombarded with an overload of visual stimuli. Hundreds of inspiration boards, ideas, and recap photos are out there just waiting for you to feast your eyes on. Some call the many, many beautiful pictures "wedding porn," and that's a pretty good term for it! I could (and have, and do!) spend hours looking at all the many ideas out there for inspiration, but I'm beginning to think I may need to stop.
I keep finding new things to add to our wedding plans! There are a lot of them that I think are really cute, but either are too expensive, too hard to do, or something that I really appreciate, but can live without. And then there are a few, two things in particular, that I can't stop thinking about.
#1 is the Photobooth.

 {Source for both}
I've seen this featured in so many weddings that I've seen online, since it's the latest "trend." And although I don't like to jump on the bandwagon, I have a feeling that unless somebody attends like 5+ weddings a year, chances are they've never seen one at a wedding. Everyone looks so happy and seems to be having so much fun in all the photobooth wedding pics I've seen. And I know Mr. Cola and I had fun at the one wedding we've been to that had a photobooth. I think it would be a huge hit with all our friends, and we could even get some fun props during after Halloween sales for some silly photo opps.
The problem though is the cost. Do we really have a spare $1000 to spend on this? That's where I'm torn. It's a pretty big chunk of cash for a few hours of entertainment...but then again we would have a million awesome pictures from it (the guests all get a print out there, and you get to keep a CD of everything at the end of the night). Plus you have the option of having a projector showing what's going on in the booth displayed on a wall for everyone to see, which makes it even more fun and enticing. Sigh, what's a girl to do?
My #2 obsession is an ice cream/gelato cart.


{Source 1, Source 2}
Wouldn't that be a neat addition to the cupcakes for dessert, to have a scoop of yummy gelato? The cart could be set up in the inside dining room near the photobooth and people could get their photos taken and then eat some gelato afterward. For $400 we can get 120 2-scoop servings, cups, spoons, napkins, 2 hrs with 1 person serving, with tax and 14% gratuity charge included in the price. But my main fear is that it would take away from the specialness of our cupcakes and awesome 6 foot cupcake stand (more on that later). But on the other hand, it could be a really cool addition too, since we're not having the traditional cake for dessert.
Having both of these add-ons would be so awesome. But are they worth the price, I'm not sure. I think if I had to choose one, it would be the photobooth, however that's over twice the cost of the gelato cart. But I think the pay-off would be better and people would enjoy it more than the extra dessert....although both would be the best!
I'm going to have to think (and drool!) over these ideas a bit more before I make any decisions. If there's anywhere I can find in the budget to include one or both of these, it would be either in savings on my dress (if I get the pretty cheap one I found online from a distributor instead of one I might find in a boutique), or maybe we could skip the $260 snorkel trip on our honeymoon, or heck, if I'm really looking for/grasping at straws for justification on these added costs, I suppose I could go without any new shoes or clothes for myself this coming fall/winter/spring....
Have you found any non-budgeted for, but super awesome additions you want for your wedding? And which would you pick if you were me, the photobooth, the gelato cart, both, or neither?
These babies are stamped and sent!


I just dropped them in the mailbox this morning:

Now, before we dive into the cost breakdown, let's have one last look at the entire suite:

Alright, now on to the not-so-fun stuff, the cost of these STDs. I didn't include the corner rounder, flower punch, x-acto knife or cutting mat in this, because I will be using them for other projects. I also didn't include the price for the full pack of paper, etc, I did it by the cost per sheet of paper used, because I will also be using the leftovers for other things. So here is what I spent on these, $3.54 each before postage (click the chart for a clearer image).

Perhaps a tad on the expensive side for STDs, I think this is more along the lines of the cost of the real invitations for most people, but oh well! I said from the beginning that I wasn't DIY'ing things just to save money, and I'm still super happy I did these Save The Dates the way I did. They're all me, baby! I love the fact that none of our guests will have ever seen STDs like these before, so the cost is well worth it in my opinion! Also, I should note that the guy at the post office didn't point out until I was swiping my debit card that the stamps he was having me buy were $0.20 over what I needed. So there was an extra cost there, but oh well.
Did you over spend on a wedding item, but were happy with the decision?
After my (almost) math screw up, it was time to add one last touch to the STD cards: belly bands! You knew all that ribbon had to have some purpose!
In comes the handy ruler, brand new scissors, and the ribbon I got from Michaels:
 11 inches x 82 of the chocolate grosgrain ribbon cut:
  And another 82 of the purple satin ribbon:
 Next I glued the ribbon together with some Zip Dry:
 Making sure that one end had both ends of the ribbon lined up exactly:
 I then broke out the handy lighter again and quickly ran the flame over the lined up end, so it wouldn't fray.
 Then I wrapped the ribbon band around the cards and glued it with the lined up and melted end on top:
 Now, doesn't that look better!? And now people will have to slide the band off to see who they're saving the date for (if you remember, our names are under where the ribbon band is).
 So, done, right? Haha, just kidding! These needed one more thing to complete them:
 Punched flower embellishments! I did all the ones out of the 65lb purple paper, but Mr. Cola was kind enough to do the 111lb green ones because it was too thick for me to punch. I then glued the green flowers behind the purple, so they looked like leaves.
 Here is a close up:
 And voila, I was done!
 These turned out awesome, and were soooo worth all the time and effort! But, you may be asking yourself, how was I going to send these to people? Well....I only said I was done....LOL!
While I was doing all the ribbon and paper flower gluing, Mr. Cola was being helpful for once, and he can take credit for our envelopes! He started by spending about an hour making a guide out of cardboard, so he could easily line up the laser cut stamp with the envelope (don't ask me why it took an hour to set this up, but as long as he was helping I wasn't going to question his methods!)
 The finished stamp guide, ready to be used:
 Ink:
Ink:
 Line it up:
 Press (and yes, I know all these stamping pictures aren't necessary. But DIY wedding help is hard to come by from Mr. Cola, so I'm documenting it all, haha!):
 The stamped front:
 Stamping the return address on the back of the envelopes:

 And done. For realz! With a clear address label.
 Next up, I'll do the cost breakdown (this might be a scary one....!).
Did your fiance help you with any DIY projects when it got down to the deadline to get something done?
Alright, I'll be the first to admit, I suck at math. Seriously! It wasn't always that way, in fact, in 7th grade I got straight A's and they let me skip a year in math classes. And that was probably my down falling. I skipped pre-algebra and went straight to 8th grade algebra...and proceeded to go from an A, to A-, to B+, to B....until come college and I was totally stoked to get a C- in my business calculus class.
 {Source}
I already mentioned that Mr. Cola is a really smart dude, so if I'm trying to figure out something other than budgets or accounting stuff, I usually ask him. This generally happens when we're laying in bed, trying to fall asleep.
So the point of this whole post is, double check your math when figuring out how much to buy for your DIY projects. Obviously, this isn't a new concept, you're probably thinking in your head, "duh, I always do!" But thank god I did, cause I was thinking that I needed to buy 600 yards of ribbon for the belly bands of our STDS!
In bed the other night, I was trying to figure out my ribbon needs, and so I asked Mr. Cola, "what's 11 (number of inches I need to go around the STD) x 82 (number of STDs), divided by 3 (to convert to yards), times 2 (to account for the 2 layers of ribbon on the belly bands). He figured it out in his head and told me it equaled 601 and some change.
Do you see where I made the mistake?
 {Source}
I went to bed that night depressed, thinking I needed 601 yards of ribbon. That was going to be expensive, and hard to find, since I'd been cleaning Michaels Crafts out of their 3 or 4 spools of the chocolate grosgrain every time I went there.
So the next day, eager to start stockpiling more ribbon, I decided to hit the 4 Michaels along the peninsula on my way home from work (as you can tell, I've gotten over my intimidation/fear of the craft store!). I went to the first one, and they had two spools of the chocolate ribbon I needed and 5 of the purple satin ribbon. I again looked at the chocolate ribbon label: 3 yards, and proceeded to double check my math (or really, Mr. Cola's math, but he told me later if I would have explained the random numbers I was asking him to multiply and divide, he would have told me then that I was doing it wrong).
I stood there in the store, with my cell phone left on the charger in my car, so I was calculator-less, and thought about it. Since it's only 3 yard spools, I have to round up to 12 inches instead of 11 for the length of the belly band. So that would be 9 belly bands I could do per spool. Right, RIGHT? I thought to myself? But then that would only be 9 spools to do 81 STDs, HUH? I stood there and scratched my head for a minute, still not really sure how much ribbon I needed, but then decided to just go buy the 2 they had available and figure it out later.
So, long story, uh, long, I went to 4 Michaels stores, cleaning them all out, and came home with 9 spools of the chocolate ribbon and plenty of the purple ribbon (it came in 10 yard spools). The moral of the story, always double check your DIY math, and, I'm a dork.
 {Source}
Did you ever screw up a DIY project by under or over calculating the amount of supplies you needed? Or come close to screwing up and then feeling dumb?
So in my last post you got to see how I made the pocket folds, now let's see what went in those suckers!
I wanted to include some basic things: the date, the location, info about the accommodations and the discounted room block, and of course a snazzy magnet so people would remember everything. I also knew I needed a cover of some sort and two inserts (otherwise, why bother with the pocket!). It was a bit of a stretch....I didn't REALLY need two inserts, so I basically duplicated the info from the magnet onto the front insert, and put the accommodations and website info on the second insert.
I laid everything out on one sheet of this butter cream card stock (it is the same weight and texture as the green pocket fold, and much lighter in real life than pictured on the website). I then flipped the paper over and printed cutting guides on the back side. I did the same with this purple lighter weight card stock, for a layer under the butter cream. I then (crazily) tried to cut these with my paper cutter.
Mmmmkaaayy, not so much! I HATE my cutter, it just doesn't cut anything straight, and is hard to line up. So I gave that up pretty quickly, and called up my "good friends at Kinko's" (I call them that because we give them like $100k in business a year through my company with last minute printing, so they know me pretty well). For only $19.54 they could cut everything for me, saving me about 20 hours of time!
And here are my beauties after coming back from Kinko's, with the purple card stock glued under the butter cream, opposite corners rounded with my precious corner rounder (edited for privacy):
 (top left is the cover, top right is the second insert, bottom left is what will go behind the magnets, and bottom right is the front insert)
The only problem I had, and I'm not sure if this was Kinko's fault or my printer not printing consistently, but I did have several sheets that were cut too close to the edge. In this picture you can see the cream sheets stacked under the purple and cream layered sheets, that is how many were too messed up to use from each stack, and I had to go back and hand cut new sheets with my x-acto knife.

The other piece to these were my magnets. I looked online at several companies that made custom ones, but ended up going with Custom-Magnets.com. They had the best pricing I found, for 250 magnets no less (250 was still cheaper than the 100 I needed!). Plus, they sent me a couple samples before I ordered, so I could make sure they were high enough quality. I hate it when I get magnets that won't even hold up a single piece of paper, and totally didn't want to send people cheapies! Here is the final product:
 (don'tcha love how they match the design of our wedding website?)
Next came the fun of gluing the covers onto the pocket folds, gluing the under the magnet sheet, and putting the inserts in the pocket. I seem to have pretty much taken over our TV room with my wedding stuff.....!

And without further ado, here is the (mostly) final product! The cover:

The inside with the magnet attached with photo corners:

And the inside with the magnet removed (I stole the idea of the fun surprise of the date under the magnet from this post):

Now, it would seem that these are done and ready to mail out, right? But no, see, my craziness just keeps on going, and since these are already overly elaborate, I had to go one step further, which I will share in my next post!
How much information did you send with your Save The Dates?
The design of our STDs (it still cracks me up that we can call it that! I know, I'm 10 years old.) evolved over about a month or so. I always knew I wanted to do a magnet, since I always loved receiving them, but had a hard time figuring out if or what we needed to accompany them. I did a poll on Weddingbee.com, and a lot of people said just sticking the magnet in an envelope would be good enough, but somehow I just wasn't convinced.
I then found this cute post using photo corners to attach the magnet to a card, and I was hooked on that idea. I was also smitten with pocket folds, but man, are they expensive! So I started thinking, what if I just made my own pocket folds, with the magnet inside? There are quite a few tutorials out there on how to make them, but my problem was the size of the paper needed. I was already set on using this paper from LCI Paper.

But it only comes in 8.5 x 11 (for $20.51 for a 50 pack) or 27.5 x 39.37 (for $232.51 for a 100 pack). I really didn't want to spend that much money for 100 of the large sized sheets, plus it seemed like they would just be too big and too hard to handle easily. So I decided to make my own template for a pocket fold made out of the 8.5 x 11 paper.
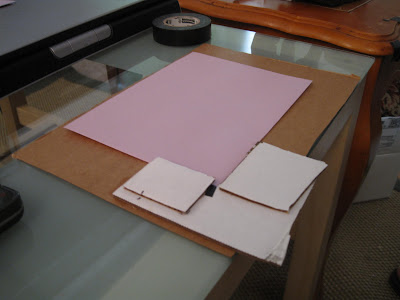
I started with a cutting mat, ruler, pencil, x-acto knife, lighter and a sheet of paper.

Using the lines on my cutting mat, I placed the ruler at 2.5 inches from the bottom of the paper (paper is lined up with the cutting mat lines, in landscape). I then lightly drew a line at the 2.5 inch mark, all the way across the paper, and made little hatch marks at 4, 5 and 10 inches. I cut along the horizontal line from the left side of the paper until just after the 5 inch mark. I also used the line on the mat to make a hatch mark at the top of the paper at 10 inches.
 Next I moved the ruler to the side so the two hatch marks at 10 inches were lined up, and I cut down the side with the x-acto knife, until I hit the line that I'd drawn across the whole sheet of paper.

Then I moved the ruler over to the 4 inch mark on the horizontal line, and cut straight down from this mark.

What you're left with is this shape.

And here you can see how I cut all the way over to the 5 inch mark on the horizontal line, making a tab.

Now it's time to get out the lighter and make some folds. I know you scratched you head when you saw the lighter on the supplies list, no, I'm not burning paper, I just used it instead of a bone folder. It works just as good, and I didn't want to spend money on a folder when I could easily use something from our junk drawer! Start by folding over the left side, making a card shape, scoring with the lighter to make a clean fold.

Unfold the paper back flat, and then fold along the horizontal line so the pocket is folded up.

Flatten the paper out again, and using the x-acto knife, cut out little angled pieces off the tops of the tabs. This will help the tabs fold in better.

Next, fold the two tabs in. This is also a good time to erase the hatch marks at the bottom of the sheet.

Re-fold the pocket up.

And then re-fold the front, making the final product 5 x 6 inches. After all of these folds and re-folds I used the lighter to make nice crisp folds.

This is what it looks like inside, with the tabs forming a pocket.

So we've got the basic shape of the pocket folds done, and I COULD just go ahead and glue the tabs and be done. But nooooo, that would be too easy! So I added an additional element: ribbon! I used the same lilac satin ribbon from the card box, and layered it with chocolate grosgrain. Since the STDs are 5 inches wide, I cut the ribbon into 7 inch strips.

And I am crazy, so I had to iron all the ribbon.

After ironing, I glued the satin to the grosgrain, and then glued the layered ribbon onto the pocket of the pocket folds, and secured the tabs to the inside of the paper.

The finished pocket:

Stockpiling pocket folds. I had to make 82 total (and grrrr, Mr. Cola snuck in a couple extra invites, so I had to go back and make three more).

I ended up doing these in sections, to make the process more streamlined. So I did all the cutting first, then the folding, then the ribbons, etc. I also grouped these in sections of 5 pocket folds, to make it a lot easier to keep track of how many I was making.
Next up in part 2, I'll show you what I actually put in these pocket folds!
Did you end up making your own template for one of your wedding DIY projects?
(all pictures in this post were taken by me)


